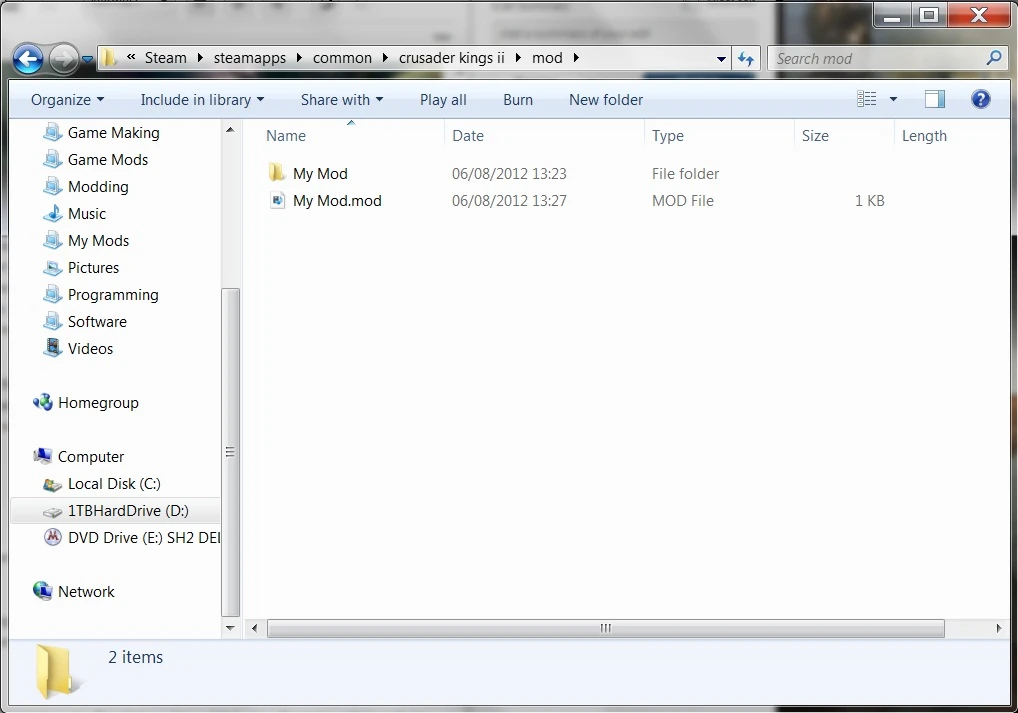
An example mod directory. This shows the old method of using the "mod" folder found in the main CK2 directory.
This guide will help you, potential Crusader Kings II modder, to setup your mod so that it is possible to load it into the game from the CK2 launcher. To do this we will be creating a new mod directory within CK2's mod folder found in the Documents folder (AKA "My Documents" in Windows XP). By doing it this way one is forced to copy any needed files, thus avoiding messing up one's CK2 installation.
Starting from your "Documents" folder (or "My Documents") we must navigate to "Paradox Interactive". Within the "Crusader Kings II" folder you will find the "mod" folder, if you don't then create a new one. In this folder you must create a new folder named after your mod; for the purposes of this guide I shall call it "My Mod". It is within this folder that you will be placing your mod files, and you must be careful to preserve the folder structure found in the main CK2 directory.
For example, "k_england.txt" can be found in "\crusader kings ii\history\titles", if your mod has modified this file then you must place the modified version in "Paradox Interative\Crusader Kings II\mod\My Mod\history\titles\k_england.txt". Equally, if you create a new title history file then you must continue to preserve the folder structure.
You will also have to create a *.mod file named after your mod in a similar fashion to the folder that you've just created. To create the file simply create a *.txt file (right-click -> New -> Text Document, for Windows users) and then change the .txt part of the name to .mod. If a warning window pops up about changing file type, just click "Yes" to continue to make the change. This file tells the game what to replace and where it's found.
An example .mod file:
name = "My Mod"
path = "mod/My Mod"
user_dir = "My Mod"
replace_path = "history/characters"
replace_path = "history/titles"
replace_path = "history/wars"
replace_path = "common/buildings"
replace_path = "common/cultures"
replace_path = "events"
replace_path = "decisions"
The first line of a .mod file defines what the name of the mod will appear to be in the launcher. In this case the mod will appear as My Mod in the launcher. The second line tells the game where the mod is kept; here it's kept in the CK2 mod folder. The third line of a .mod file is defining the folder where temporary files such as savegames and error logs can be stored. This is in fact the end of all of the required lines for the mod to run correctly, of course, with just these three lines you'll just be playing vanilla CK2 under a different name. For every file that you have made changes to or any files that you have added, you will need to add the path of the folder that it is in to the .mod file. Following the "k_england.txt" example, you will need to add the line replace_path = "history/titles" (with the quotation marks).
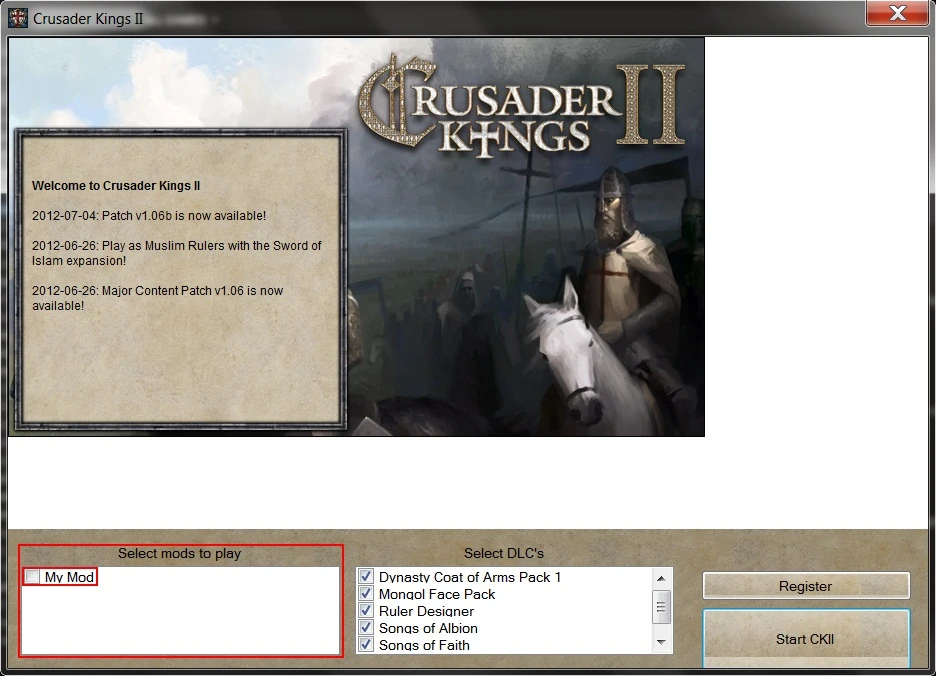
Go ahead and add the first three lines to your .mod file. If all goes well, then you should be able to select the mod in the CK2 launcher.
Success!
Testing[]
The fastest and easiest method of seeing whether Crusader Kings II is loading your mod correctly and to see if you have correctly setup your mod, is to change one of the localisation files. These files are what the game uses to determine what text to display for each language from the internal name that the game uses for the current item. For example, k_england is the game's internal name for the Kingdom of England. Clearly this is not appropriate text to display to players.
k_england;England;Angleterre;England;;Inglaterra;;;;;;;;;x
This line tells CK2 to display England, Angleterre, England, or Inglaterra (english, french, german, and spanish respectively) whenever k_england is supposed to appear in text. So if we wanted to change the name of England to, say, TESTING then all what we need to do is this:
k_england;TESTING;TESTING;TESTING;;TESTING;;;;;;;;;x
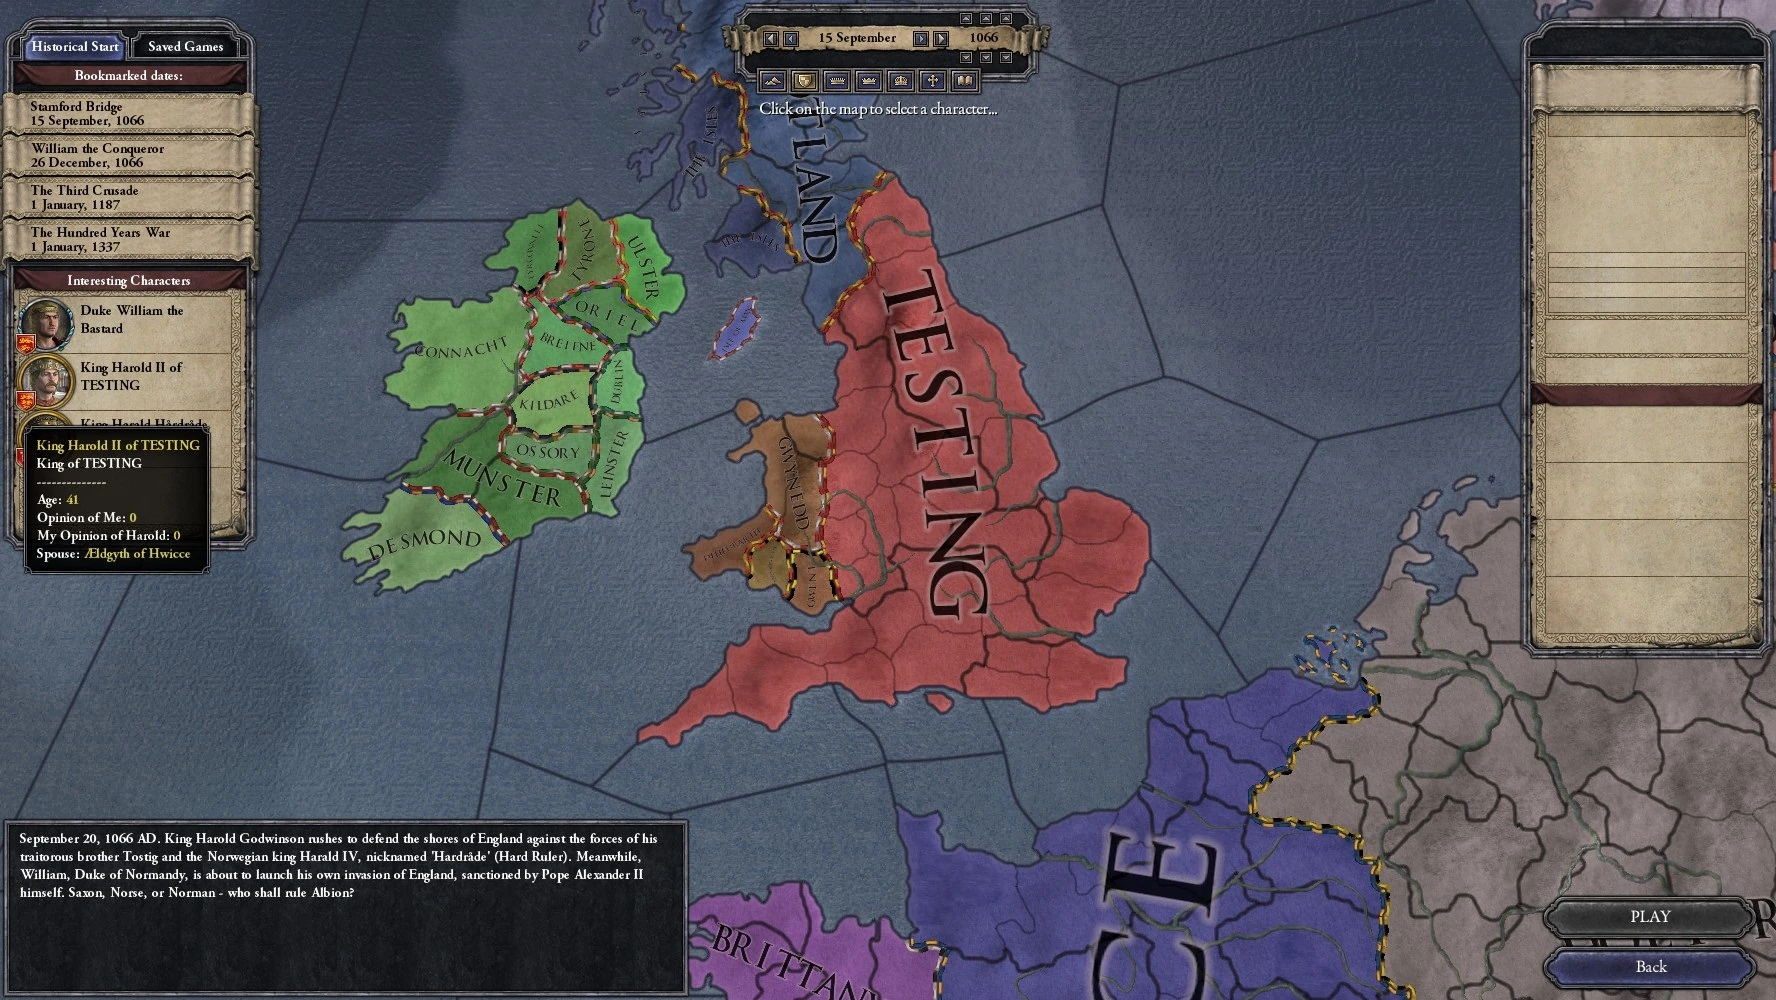
Now the Kingdom of England is the Kingdom of TESTING! Well, according to the game anyway.
To implement this quick test, you first need to create a "localisation" (without quotation marks) folder in your mod folder. Now copy text1.csv from CK2's localisation folder to your localisation folder found in your mod's folder. From here, simply open up the file, find the above k_england line, and modify it. Once finished, remember to save.
If you were to load up your mod now you will find that our changes have not taken place, and England remains as England. What went wrong? We haven't told the game what to replace, and how do we do this? By adding these lines to the end of the .mod file that I mentioned earlier in the guide.
replace_path = "localisation"
Do this and then load up the game, and what greets us?
More success!
Notes[]
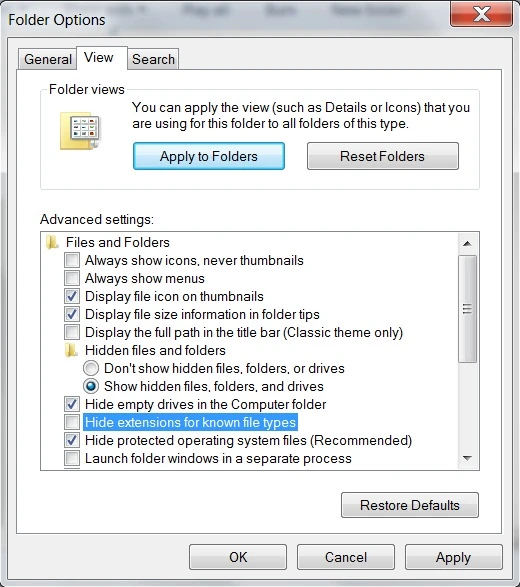
If you cannot see the file extension .txt on your created text document then you will need to go to Folder Options and uncheck the "Hide file extensions for known file types". Make sure to click the "Apply" button to make your change.

Making sure that file extensions can be seen.
| Modding Guides | |
|---|---|
|
Getting Started |
Setting up a mod • Adding Landed Titles, Part 1 |
|
Intermediate Guides |
Adding Landed Titles, Part 2 • Adding Landed Titles, Part 3 • Custom music (playlist) in Crusader Kings II • Editing Save Files |